She Loves The F Word

Food

Paleo Thai Bowls

Foodkate lawComment
image.jpg

I don't know about you but I can dominate some Thai food.   Seriously, what is it about Thai food that makes me want to eat it so fast that I forget to come up for air?  Over the past year, I have been able to modify most of my favorite Italian and Mexican recipes to be 'clean' but I haven't had much luck with modifying Asian food until now.  I was STOKED when I came across this Paleo friendly Thai bowl on PaleOMG.    Juli has yet to let me down, so I knew this recipe would not disappoint.  Boy, was I right.  The first time I made this recipe was for a Sunday dinner when my in-laws were in town.   They LOVE Thai food but have been trying to eat clean as well so I thought trying this recipe was worth a shot. If it sucked balls, then I'd just order the real deal.  They wouldn't judge if it was a fail, cause they're cool like that.  Whelp, OMG doesn't even begin to justify how good this recipe is!  It is now a staple in my weekly meal prep and I always share it with my 21 day fix challenge groups.  Hands down this and my  pizza bake are always my challengers favorite dishes.  So instead of keeping this gem to myself, I just had to share with ya'll.  You're welcome!

This recipe uses "Zoodles" (spiral sliced zucchini) instead of your typical Thai Noodle.  I used my Veggetti to spiral my zucchini.  Personally, I think the name 'veggetti' sounds like a venereal disease but I love this little tool so much I don't care.   You can use zoodles to replace noodles in almost any recipe.  It's so easy to use. Just wash your zucchini, slice off both ends, place in the Veggetti and spiral away.   I usually like to pat the zoodles dry with a paper towel to absorb the excess water before cooking. I also give them a rough chop to cut up any of the really long zoodles. Zoodles cook very quickly in a pan (3-5 minutes) so I always throw them in last for whatever recipe I'm using them in (Spaghetti, Lo Mein, etc).  No need to boil these noodles!  #winning

The other 'clean' swap in this recipe is liquid amino acids or coconut amino acids instead of soy sauce.    Never heard of amino acids for cooking?  It's a great gluten-free alternative to soy sauce because of its salty umami flavor but it is salt free and preservative free.  Coconut aminos are another great option to swap for traditional soy sauce.  This is a dark sauce made from coconut sap that is salty and slightly sweet.   It is the perfect replacement for those avoiding soy and gluten. Coconut aminos are low GI and packed with minerals, vitamin C, and B vitamins.  I use it as a replacement for soy sauce in all my recipes (and for sushi)! You can usually find aminos in the soy sauce aisle or on amazon I buy braggs or these coconut aminos

The recipe itself is pretty simple so I'll just jump right down to the nitty gritty but I wanted to leave you with one last tip.  Make sure you are using the regular coconut milk (in a can).  I tried this with the lite coconut milk and the sauce was too thin.   You need the fat in the coconut meat to thicken this sauce properly.    For my 21 day fixers, I would count this recipe as 1 red, 1 green, 1/2 yellow and 2 teaspoons.  Enjoy and don't forget to breathe when you inhale this delicious recipe.  

image.jpg

Paleo Thai Bowls

  • 1 pound ground pork
  • ½ small yellow onion, diced
  • 1 red bell pepper, sliced
  • 2 garlic cloves, minced
  • 3-4 medium zucchinis, spiral sliced into zoodles
  • 1 (14 ounce) can coconut milk
  • ½ cup peanut butter
  • ¼ cup coconut aminos (or liquid aminos)
  • 3 tablespoons chili garlic sauce (or sriracha)
  • juice of ½ a lime
  • ½ tablespoon red pepper flakes, divided
  • salt and pepper, to taste
  • fresh cilantro for garnish
  • cashews for garnish

Instructions

  1. In a large pan add add ground pork, onion, red bell pepper and garlic cloves.  Cook on medium-high heat.
  2. Stir occasionally to break up meat and cook down. Add a touch of salt and pepper along ¼ tablespoon of red pepper flakes. Mix well and cook until no pink remains in the meat.
  3. Once meat is cooked through, add zoodles to the meat and cook on low for 5 minutes, stirring occasionally. 
  4. In a small saucepan add coconut milk, peanut butter, coconut aminos, chili sauce, lime juice, ¼ tablespoon red pepper flakes, and a bit of salt and pepper. Cook on medium heat while whisking to combine until smooth.
  5. Once sauce is smooth, reduce heat to low and let thicken for about 5 minutes.  DO NOT SKIP THIS STEP or you will have runny sauce! 
  6. After sauce has thickened, pour sauce on noodle and pork mixture and mix well to combine.  I usually only use about 3/4ths of the sauce as sometimes the size of my zucchini vary.  If you need more sauce you can always add more.  I find that it varies each time I make it.  
  7. Garnish zoodle bowls with fresh cilantro and cashews on top.

I Scream, You Scream!

Foodkate lawComment
image.jpg

We all scream for ice cream!   3 cheers for Summer.  In honor of the first full week of Summer,  I'm posting one of my family's favorite Summertime treats, S'more ice cream sandwiches.      

I got the idea for these gems after visiting the San Diego County fair several years ago.  The fair is famous for ridiculous food combos including deep fried Oreos and Krispy Kreme cheese burgers. I saw this ice cream sandwich at a stand and had to have it.   It was so mind blowingly good that I knew I had to run home and recreate it. Now it's a Summertime staple in the Law house.  It's only 4 ingredients and it's pretty much impossible to screw up so what are you waiting for?  Get these 4 ingredients and GO:  

  1. Graham Crackers
  2. Chocolate Chips
  3. Mini Marshmallows
  4. your favorite ice cream
image.jpg

Start by melting chocolate chips in a microwave safe bowl.  Heat 30 seconds at a time stirring in between until the chips are smooth.  Be careful not to over heat.  

image.jpg

Break graham crackers in half and place on a parchment paper lined baking sheet. 

image.jpg

Spread melted chocolate onto top half of a graham cracker with a knife. Place flat in the freezer until chocolate hardens (about 10 mins).   

image.jpg

Try to keep curious toddler hands away from these chocolaty treats. 

image.jpg

Pull your favorite ice cream out of the freezer to soften for a few minutes.   This week I used peanut butter chocolate because why the hell not!?  I like the slow churned ice cream because it is softer and easier to scoop out.   Also I'm not mad about saving a few calories here and there, ya feel me?  

Next tear off a few 12x6 inch pieces of aluminum foil.  You'll need one piece of foil for every ice cream sandwich you are making.  The key is to have these all torn and prepped before you get into the ice cream part because once you start scoping ice cream, you'll need to move quickly to avoid a melty mess.       

image.jpg

Scoop one full scoop of softened  ice cream onto the non chocolate side of one graham cracker. Top the ice cream with a few mini marshmallows. Resist the urge to get cray cray with the marshmallows.  You will need some ice cream exposed to help "glue" the top graham cracker in place.   

image.jpg

Place the top cracker on top of the ice cream with the chocolate side facing out. Add a few additional mini marshmallows to the sides of the sandwich.   

image.jpg

 Wrap each sandwich in tin foil and return to the freezer to harden.  

image.jpg
image.jpg

Remove from the freezer and enjoy!!!

image.jpg

I promise I'll be back with some healthy, 21 day fix approved recipes next but until then, I'm just going to sit here and shove my face in this chocolatey goodness.   

Chocolate Chip Blondies - Paleo Edition

Foodkate law2 Comments

Summer!!!!  I love you!   Where have you been all my life?!!   You know what, I'm not even mad, let's just get busy making up for lost time.  Bring on the BBQ's, bleach blonde hair, bikinis oh and let's kick it off with a 3 day weekend.  HOLLER!!   While I'm all for a splurge here and there - don't let all the partyin' and good times crash the progress you're making on your bikini bod.  After all, you still have the whole Summer ahead of you.

That's why I got your back with a paleo friendly dessert that will bring all the boys to the yard.    My girl Jill introduced me to this recipe on her blog Glitter Grace & Thyme.  When she was going through in vitro she had to have a very strict paleo diet.  Let me tell you, this girl knows her way around a paleo kitchen!  Since I'm not *exactly* 100% paleo, I've made a few tweaks but for all intents and purposes this is still a paleo friendly recipe.   Either way you stack, it you have yourself a healthy(ish) dessert.   

In honor of those summer time highlights I can't wait to have, I present you my Paleo Chocolate Chip Blondies. 

First start blending a can of chickpeas in a food processor.  If you have a bad #ss kitchen aid mixer, that will work too.  After the chickpeas are smooth, add the PB, vanilla extract, coconut sugar, maple syrup, baking soda, baking powder, sea salt, mix until smooth.  Hand mix in 3/4 cup of chocolate chips. 

Spread mixture into a parchment paper lined pan and then sprinkle on top the remaining 1/4 cup of chocolate chips. 

Bake at 350 for 40- 50 minutes until a toothpick comes out clean. 

Remove - let cool then cut that sh#t up and dive in!

Chocolate Chip Paleo Blondies:

  • 1 can of chickpeas, drained (16oz)
  •  3/4 cup of natural peanut butter
  •  2 tsp of vanilla extract
  •  1/2 cup of coconut sugar
  •  1/4 cup pure maple syrup
  •  1/2 tsp of sea salt
  •  1/2 tsp of baking soda
  •  1/2 tsp of baking powder
  •  1 cup of chocolate chips,  (use the dairy free chips to make it 100% paleo)

Directions:
Preheat oven to 350 degrees. Line a 8x11 pan with parchment paper, coat the parchment paper and sides of the pan with coconut oil.


Place all ingredients except chocolate chips in a food processor or a kitchen aid and mix until smooth. Add 3/4 of the chocolate chips to the batter and mix


Pour the batter into the pan and sprinkle with the remaining chocolate chips. Bake for 40-50 minutes make sure to do the toothpick test at 40 - it's easy to over cook these.
Remove from oven and let cool.

This recipe is proof, blondes really do have more fun!

She maka the meatballs...

Foodkate lawComment

If y'all are like me you probably over indulged this Easter weekend.  I'm talking mimosas, entire blocks of brie and jelly beans galore.   I don't know about you, but I'm ready for a junk food detox.   If you feel me, then you should definitely try my zucchini turkey meatballs this week.   My husband calls these "Tricky Meatballs" because it's one of ways I hide veggies from my kiddos!  Granted, I literally have to grate all the veggies into the tiniest, most minuscule pieces so Kam can't detect them, but Hey, desperate times call for desperate measures.  This recipe is delicious served over spaghetti squash and topped with tomato sauce or even on top of a salad.  However you choose to serve them, I promise they will not disappoint. 

First you will want to grate your zucchini and squeeze out excess water.

Next, mix zucchini, chopped onion, basil, garlic, Italian seasoning, Parmesan,  chopped sun-dried tomatoes (optional), nutmeg, salt, pepper, and bread crumbs.  Lately, I've been swapping the bread crumbs for cooked quinoa and I actually like it better. Plus, it's a good way to sneak in some extra protein and super foods.  See - they really are tricky meatballs!  

Mix in ground turkey meat and egg.  With your hands roll the mixture into individual balls.  I like to make a lot of small meatballs, about one inch each, but feel free to make them as big or small as you like.    

Place meatballs on a parchment paper lined baking sheet about 2 inches apart.  Bake for 15-20 minutes at 350 degrees, rotating the meatballs halfway through.

Remove and enjoy!

Tricky Turkey Meatballs

  • 1 pound ground turkey
  • 1 egg
  • 1 cup zucchini, shredded and squeeze out any excess water
  • 1/4 cup chopped onion
  • 1/3 cup bread crumbs or cooked quinoa (add more if too moist)
  • 1 tablespoon Italian seasoning
  • 1 teaspoon chopped garlic
  • 1/3 cup shredded Italian cheese (optional if a whole 30 follower)
  • Basil (3-4 leaves)
  • Salt and Pepper
  • A pinch of nutmeg
  • handful of chopped sun dried tomatoes (optional)

Directions

  1. Preheat oven to 350 degrees.
  2. In a large mixing bowl add all the ingredients and mix with hands until combined. Form into desired sized meatballs and place on a baking sheet about 2 inches apart from each other.  Bake for about 15-20 minutes depending on size of meatballs.  I like to rotate my meatballs about half way through.
  3. Remove from oven and serve with spaghetti squash or noodles and top with your favorite sauce. 

If I have time, I like to make up a big batch of this sauce and freeze it.  But if I'm in a pinch, I've found this great clean tomato sauce, Cucina Antica Marinara.    It's low sodium, low sugar, and made only will fresh ingredients!

Clean Marinara


Meatball recipe inspired by Kim's Healthy Eats

She Loves Pizza!

Foodkate lawComment

Given that my last recipe post was an over the top indulgence, I figured I'd better quickly follow up with a healthy post.  Plus, I'm sure most of you will be nursing a Super Bowl hangover tomorrow and ready to start fresh after the 6,000 calories you consumed today.  So you're welcome.

I love pizza and my family loves pizza but it's far from 21 day fix approved.   This is the new recipe I use for our family's pizza night.  It's what I like to call a Spaghetti Squash Pizza Bake.  It's easy, delicious and 100% 21 day fix approved.   Plus it's pretty much one of the few ways I can get Kam to eat veggies! #winning.  I usually whip this up on Sundays and reheat later in the week for a quick and healthy weeknight dinner.

Start by cooking your spaghetti squash.  If you have time, I recommend baking it (following my directions in the recipe down below).   I like the flavor of it baked better.  However, if you are in a pinch for time, I have a trick for cooking the squash quickly.   And let's be honest, I always need the shortcut.  Poke holes all over the squash with a fork then place the whole squash in the microwave.  Heat on high for 5 minutes.   Flip over and heat again for 5 minutes.   Remove from the microwave with oven mitts - that sh#t's hot.  Let cool then cut in half.  Scoop out all of the seeds with a spoon.  Then use a fork to scrape out the 'noodles' from the squash until only the skin remains.  

Place the "noodles" in a greased baking dish and set aside. 

Remove your sausage from the casing and place in a pan.  Heat the turkey Italian sausage, onions, garlic, tomatoes and any other veggies you want to add.

Add in fresh or dried basil, pizza sauce, salt and pepper to taste.

Pour sausage and sauce mixture over the 'noodles' and mix together in the greased baking dish with tongs. 

After all ingredients are thoroughly mixed together pour the egg whites over the entire pan.  Mix together until you can no longer see the egg whites. 

Sprinkle mozzarella cheese on top and bake in the oven at 350 degrees for 1 hour.  

Let sit for 5 minutes then portion out and serve!

Spaghetti Squash Pizza Bake

Serves: 4-6

Ingredients

  • 1 large spaghetti squash
  • 1 pound Italian turkey sausage
  • 1/2 yellow onion - diced
  • 2 cloves garlic - minced
  • 1/2 cup chopped cherry tomatoes
  • 1 cup pizza sauce (no sugar added, low sodium)
  • 1 teaspoon basil (I used fresh but dried will work too)
  • salt and pepper, to taste
  • 4 egg whites
  •  1/4 cup shredded mozzarella
  • Optional: add anything you like on your pizza: other veggies, more meat, even more cheese if your feeling wild!

Instructions

  1. Preheat oven to 400 degrees.
  2. Cut spaghetti squash in half lengthwise. Place spaghetti squash cut side down on a parchment paper lined baking sheet and bake for 20-25 minutes.
  3. Once squash is done cooking, remove 'noodles' and place in an 9x13 greased baking dish.
  4. Reduce oven heat to 350 degrees.
  5. Place a large pan over medium heat.  Remove Italian sausage from skin and place in the pan.  Add onion and garlic. Cook until no pink remains in the sausage and it is broken up into pieces.
  6. Add pizza sauce, basil and salt and pepper to the pan and mix well.
  7. Add sausage mixture to the 9x13 dish and mix well with spaghetti squash 'noodles'.
  8. Lastly, add egg whites to the baking dish and mix everything together until you can no longer see the eggs.
  9. Place in oven and bake for 1 hour or until the top of the mixture forms a slight crust.
  10. Let rest for 5 minutes before serving.

***21 day fixers - 1 serving counts as 1 Green, 1 Red, and 1/2 Blue (depending on how much cheese you use)***


Recipe adapted from OMG Paleo

The World's Best Turkey Burgers

Foodkate lawComment
turkey.jpg

Happy New Year Ya'll!   The new year brings new goals and a fresh start.   Raise your hand if your 2016 resolution is to eat healthier.   If your hand is up, you are not alone.  Staying healthy isn't easy. Sometimes you just need a good burger,  ya feel me? 

Have no fear, I have the World's Best Turkey Burger recipe to help you ease your way into a healthier lifestyle.   It's delicious, hearty, healthy and most importantly it leaves me feeling full and satisfied. This recipe is 21 day fix approved and as an added bonus, it's a great way to sneak in extra veggies for your kiddos.   F YA!  

These turkey burgers are a real crowd pleaser.  I could literally eat them every day and never get sick of them.  I make this recipe once a week for my family, no joke.  All my friends make this recipe for their families as well.   Our husbands joke they that they thought the 21 day fix program was just this recipe because we eat it so often.  They are that damn good.   I eat them on a whole wheat bun, without a bun, over a salad, with tzatziki and cucumbers, with ketchup or mustard, you name it, it still tastes delicious.      

Go ahead try it.  I dare you not to like it.  

Ingredients

  • 1 lb. ground turkey
  • 6 halves sun dried tomatoes (chopped)
  • 1/2 medium red onion
  • 1 cup of fresh spinach
  • ¼ cup crumbled feta
  • 1 tsp dried oregano
  • ½ tsp minced garlic
  • ⅓ cup wheat bread crumbs
  • 1 egg white
  • sea salt and pepper to taste
  • ½ chopped red pepper
  • Option to add ½ cup grated and squeezed zucchini


Instructions:
Roughly chop the spinach, sun dried tomatoes, onion, and red pepper. 
Grate zucchini in a bowl.  Squeeze out all excess moister from zucchini.  In a bowl combine the ground turkey with the zucchini spinach, sun dried tomatoes, red onion, feta, ½ tsp minced garlic, dried oregano, egg whites, bread crumbs, ½ tsp of sea salt and some freshly ground pepper. Stir everything until it is evenly combined. Shape the mixture into six patties.
Cook the burgers on a counter top grill, a non-stick skillet or over open flame.    Serve with Tzatziki and cucumber or any toppings you desire.


For 21 day Fixers I count 1 patty as 1 Red, 1/4 Green, 1/2 blue
 
- Some images and this recipe were adapted from holymolymeohmy.com

Healthy(ier) Crunch Bar

Foodkate law1 Comment

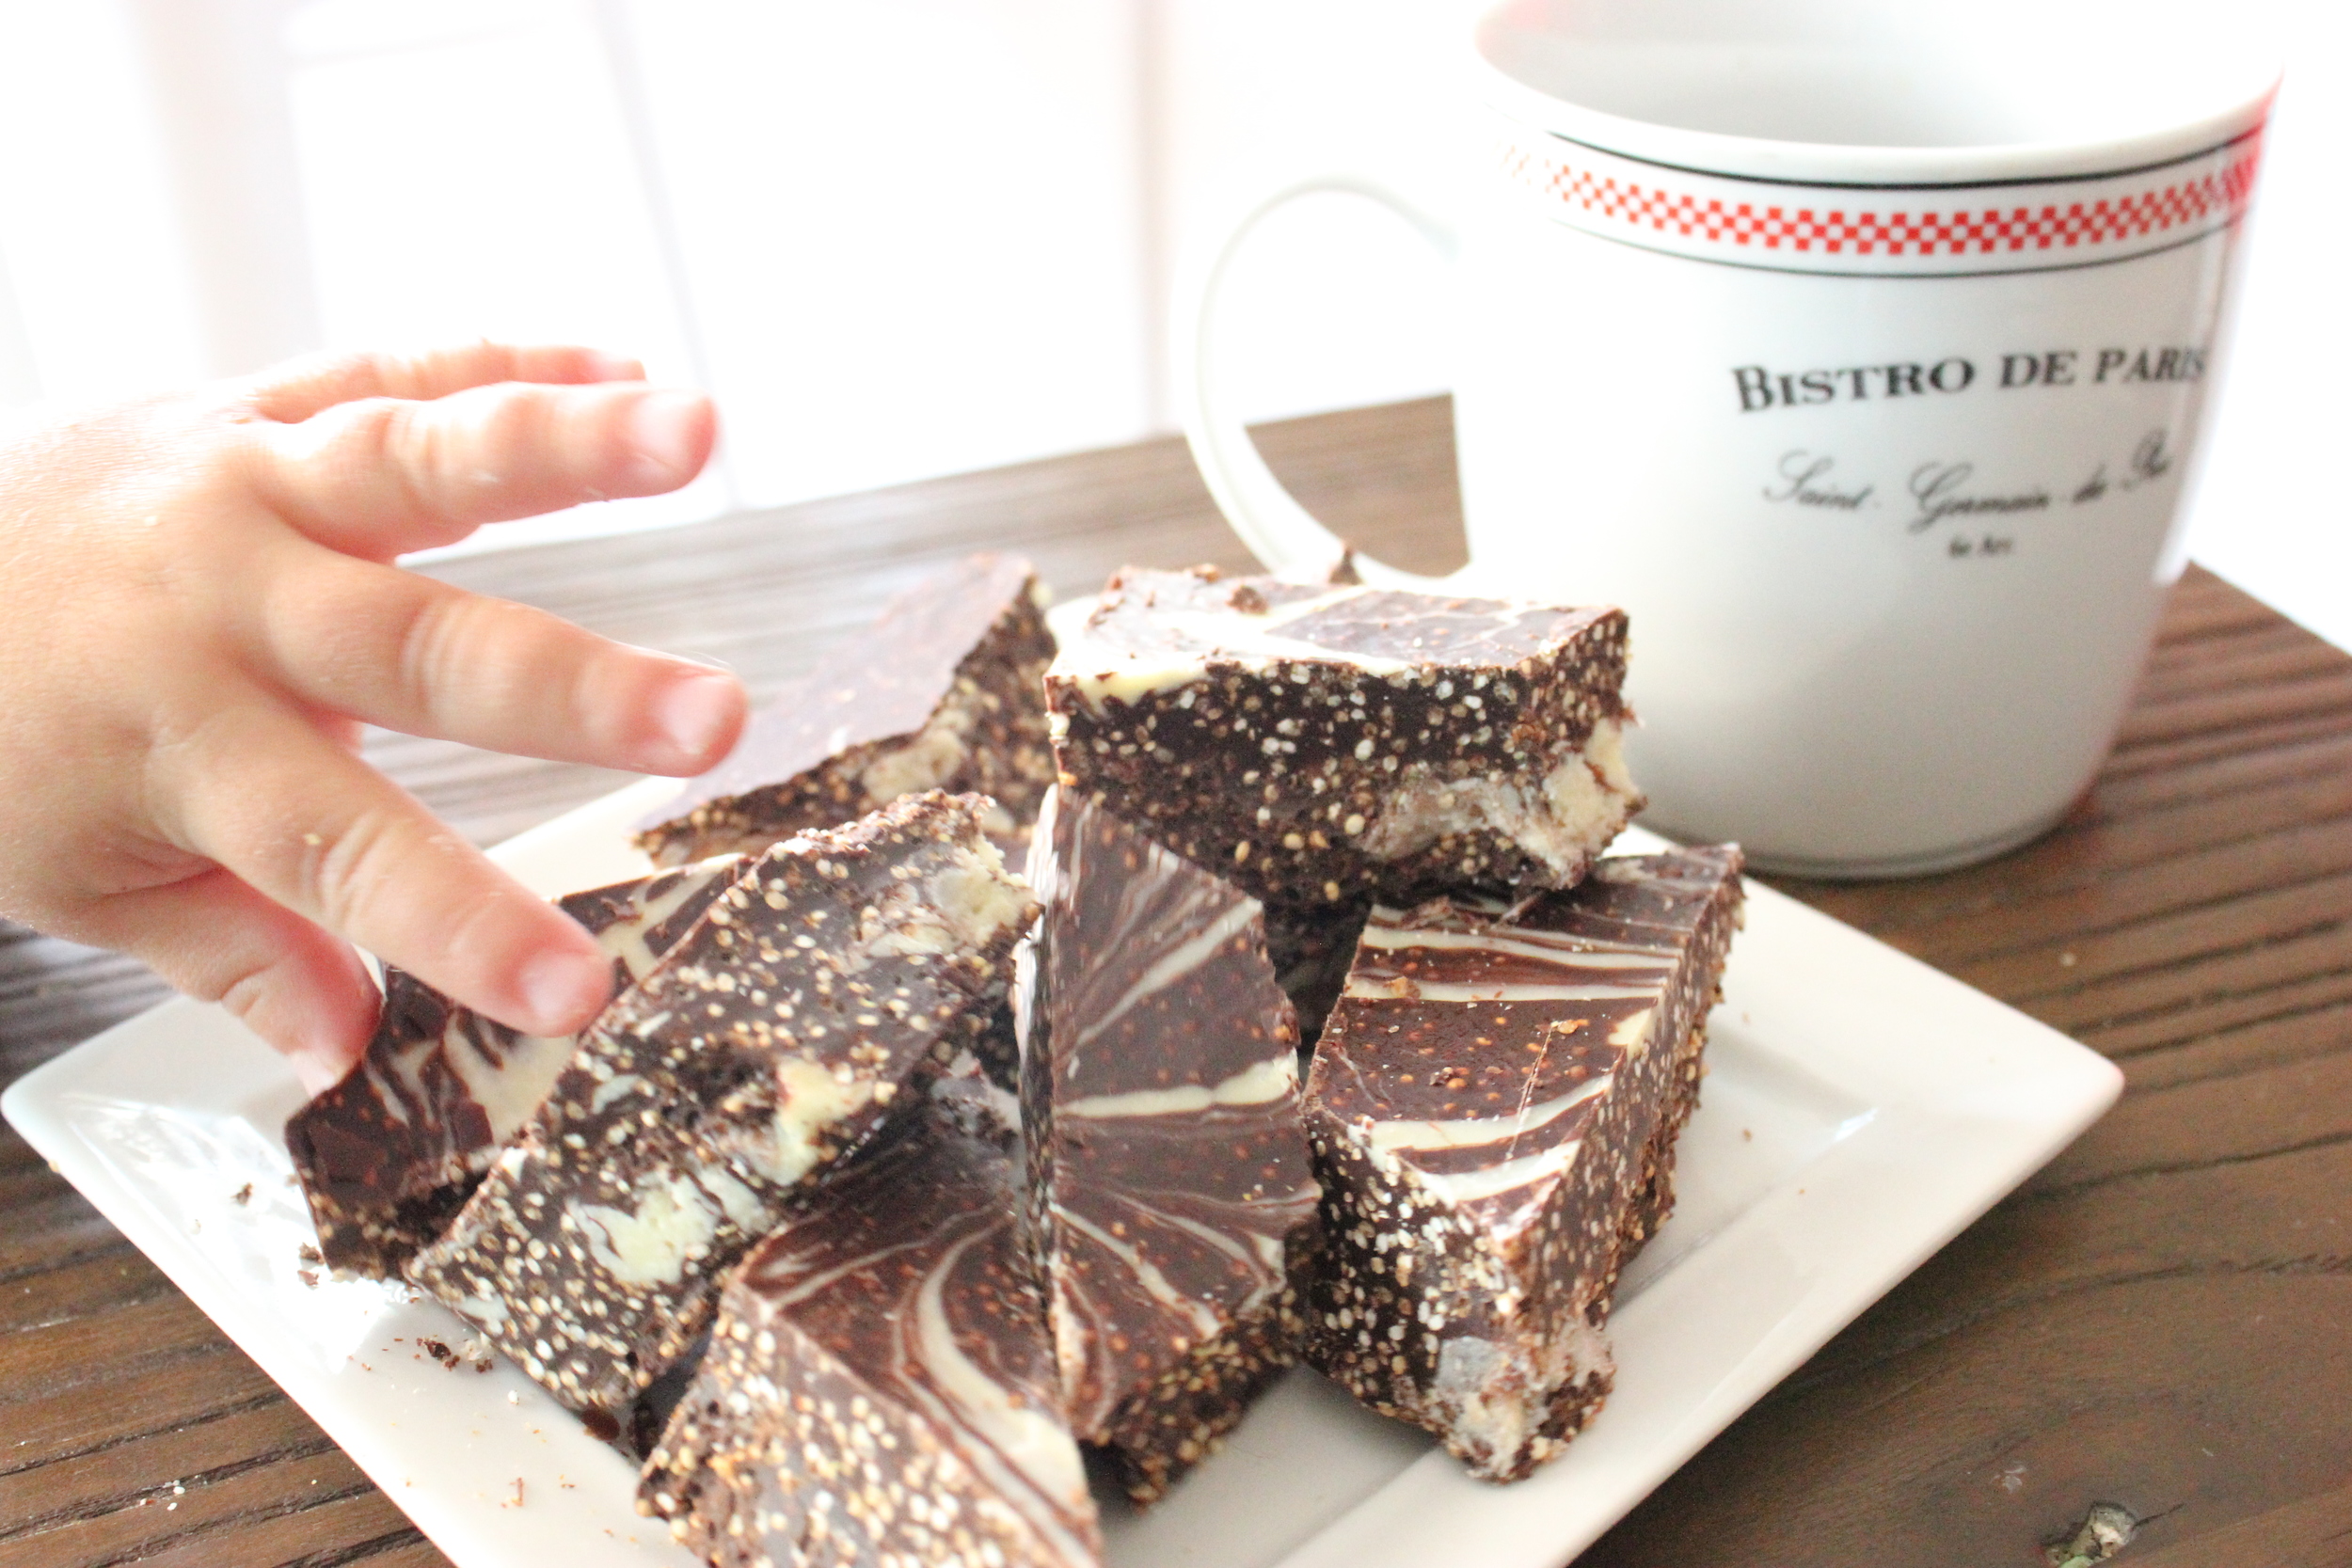
I saw this recipe on Thrive Market's blog and I knew I had to try it.    It's no secret I'm a huge fan of quinoa and I may be one of the few adults that will actually still eat a Crunch bar so this combo made my wildest dreams come true.     It's 'healthy' because it's packed full of antioxidant rich dark chocolate and the amazing superfood quinoa.  

Quinoa is one of the most protein rich foods we can eat. It is a complete protein, meaning it contains all 9 essential amino acids. It also has twice as much fiber as most grains. As if that wasn't reason enough to love quinoa, it contains iron, lysine, magnesium, riboflavin, and a high content of manganese. Quinoa is basically the bada#s of all the grains. I put it in everything: salads, burgers, meatloaf, and now desserts. YES!!

First things first for this delicious dessert, I had to pop the quinoa. This was a totally new experience for me so of course I just You Tubed it.  Duh. I'll save you an internet search and give you the down low below.

POPPING QUINOA

I rinsed the quinoa several times under cold water and drained it on a paper towel lined strainer. After the quinoa was thoroughly dried, I spread it out over a baking sheet. Then I baked the quinoa for 1 hour at 100 degrees F,  until it was completely dry.

After the quinoa was done in the oven, I set it aside to cool and got ready to pop it like it's hot.   See what I did there?  

I heated a heavy pot over medium-high heat. I put 3 tablespoons of quinoa into the pot and covered it with a lid.  No oil, no nothing, just my hot pot and my quinoa. It took a me a few attempts to get the hang of it but basically if the pan is hot enough, the quinoa will pop right away, sort of like popping popcorn on the stove. After the popping died down, I removed the popped quinoa and poured it into another bowl. I repeated this for several rounds, 3 tablespoons at a time, until all the quinoa was popped.  

Aside from using popped quinoa for this kicka#s dessert, you can eat toasted quinoa as a snack, like popcorn. The protein and fiber in quinoa will keep you fuller longer than popcorn.   Another added bonus is it stores for several days in an airtight container.   

Popped Quinoa

Popped Quinoa

After all my quinoa was popped, I melted the dark chocolate in a double boiler over the stove.  This double boiler was my grandmother's.  It's an oldie, but a goodie. They just don't make them like this anymore, I swear. Plus it makes me happy when I use it.  It reminds me of a story my grandmother still tells about a time she was visiting when I was little.  She, my mom and I were all cooking together in the kitchen.  My Grandma was trying to help me wash a dish in the sink.  I clearly didn't want her help and I turned to my mother and said, "Mom, she thinks this is HER kitchen."  I guess I always was a bossy B.   

After the dark chocolate was melted, I mixed in the popped quinoa and then poured it on to a parchment paper lined glass pan.  

I went back to the stove and melted the white chocolate in the double boiler.   The original recipe only called for 4 oz white chocolate, but the first time I drizzled in the white chocolate it just dumped right to the bottom. DAMN.  I was determined to make this as pretty as the original picture so I melted 4 more oz of white chocolate and tried again.   Nailed it!  After I drizzled in the white chocolate, I used two toothpicks to swirl the chocolates together in a pretty marble pattern.    Take that Pinterest!

IMG_4894.JPG

I refrigerated the entire pan until the chocolate was solid and then cut into chunks.  We were headed over to our friends house for a group dinner that night so I figured I'd take them for a taste test.  My girlfriends might pretend like they like it just to be polite and but their husbands will tell it like it is. I'm known for my decadent desserts and these big boys will call me on my diet sh#t if it's not good.

So did this recipe pass the husband taste test?   Well, let's just say Max wasn't the only guy sneaking an extra bite of chocolate crunch.....


 So make like Max, and Treat Yo' Self to this guilt free dessert!  

Quinoa Crunch Bars

Makes: 1 8x11 pan

Prep Time: 1 hour 15 min

Active Time: 15 min


INGREDIENTS:

24 ounces 70% dark chocolate (or higher)
1 3/4 cups popped quinoa
8 ounces white chocolate 


Line an 8x11-inch baking pan with parchment paper


Melt dark chocolate in a double boiler over a water bath.  Remove from heat and stir in popped quinoa. Pour into prepared pan.

Melt white chocolate in a double boiler over hot water bat. Pour over dark chocolate.   Use a toothpick to swirl the two chocolates to create a marbled pattern. 

Refrigerate until set. Cut into desired chocolate bar sizes.


***If you are following 21 day fix, I would count this as 1 yellow but use it as one of your treats for the week.  


The Accidental Pomegranate Salad

Foodkate law1 Comment

Last weekend I attempted to grocery shop with both kids.   Why on earth would I do that to myself?  I'm not quite sure, but I did.  After a pit stop at the bathroom for Kam, an opened bag of graham crackers for Max and a new comic book for them to share, I finally made my way to the check out with 2 kids and a cart full of groceries.   As I started to unload the groceries I found something peculiar.  What is this? A pomegranate?  How did this get in my cart?  I'm pretty sure I don't like pomegranates.  I don't even know how to eat them.  

I looked up at my 3 year old and he had the biggest sh#t eating grin on his face. Thanks Kam. I was too far in to turn back, so I did what any desperate mom would do, I paid for it and got the heck out of the store!   I'd figure out what to do with it later.

So there I was with a pomegranate.   One pomegranate.   Now what?   First I had to look up how to cut it.    It turns out, it's pretty easy.   Just slice off the top of one end, score along the seams, break it open, and peel away the arils (seeds).   I found it easiest to do this under water.  Discard the waste and strain the seeds. 

Guess what? I actually didn't hate pomegranate seeds but I thought they were kind of boring on their own.  I remembered I saw a recipe for a quinoa salad with pomegranate seeds, which would be perfect as I had some left over quinoa.  

After a quick internet search and scan of my cupboard, I found a few different recipes I thought I could marry together to make one pretty awesome pomegranate salad.  I had a butternut squash I had picked up at the farmers market, along with some dried cherries, pecans, and of course the left over quinoa.  

I chopped the cherries and pecans and tossed them together with the squash and quinoa.  Then I whipped up a delicious dressing with orange juice, red wine vinegar, maple syrup, extra virgin olive oil, and a dash of cinnamon.  After I tossed that together, I thought something was missing.  I really wished I had some goat cheese.  I didn't.  But I had feta.  I threw some feta in and BAM - that was it!  The best accidental pomegranate salad I'd ever had.    Mostly because I've never really had a pomegranate salad but hey, this sh#t is good.   Even my husband agrees.  He ate the whole thing before I could get a pretty propped picture so all I have for you is captured is below.  

I guess the lesson of the day is, when life serves you pomegranates, make a kicka#s salad!


The Accidental Pomegranate Salad

Serves: 4

Time: 30 minutes


Dressing:

1 tbsp  extra virgin olive oil

1 tbsp maple syrup

2 tbsp fresh squeezed orange juice

1/8 cup red wine vinegar

Dash of cinnamon

Dash of sea salt


Salad:

2 cups cooked quinoa

1/2 large butternut squash cubed

1 pomegranate (seeds only) 

1/4 cup feta (or goat) cheese

1 handful of chopped pecans

1 handful of chopped dried cherries


Directions:

  1. Prepare quinoa as directed on the package.
  2. Cook butternut squash.   I like to microwave mine because it's the quickest and easiest way.  Simply poke holes all over the squash with a fork and microwave for 3-4 minutes on each side, or until squash is soft.   Set aside to cool.  Once cooled slice in half, scoop out seeds, and cut one half into 1 inch cubes.  
  3. In a large bowl toss together the quinoa, chopped dried cherries, feta (or goat) cheese, pomegranate seeds, pecans and butternut squash.
  4. In a small bowl, whisk together the extra virgin olive oil, red wine vinegar, orange juice, and maple syrup.  Add salt and cinnamon to taste.
  5. Pour the dressing over the salad,toss and serve.  

**If you follow the 21 Day Fix program one serving would could as 1 yellow, 1 green, 1/2 blue, 1/2 purple, 1 teaspoon